Step 1: Registration and Setup
- Sign-up to app.bvcircuits.com.
- Make sure you have Siemens Xpedition or PADS software installed on your computer.
Step 2: Project Details
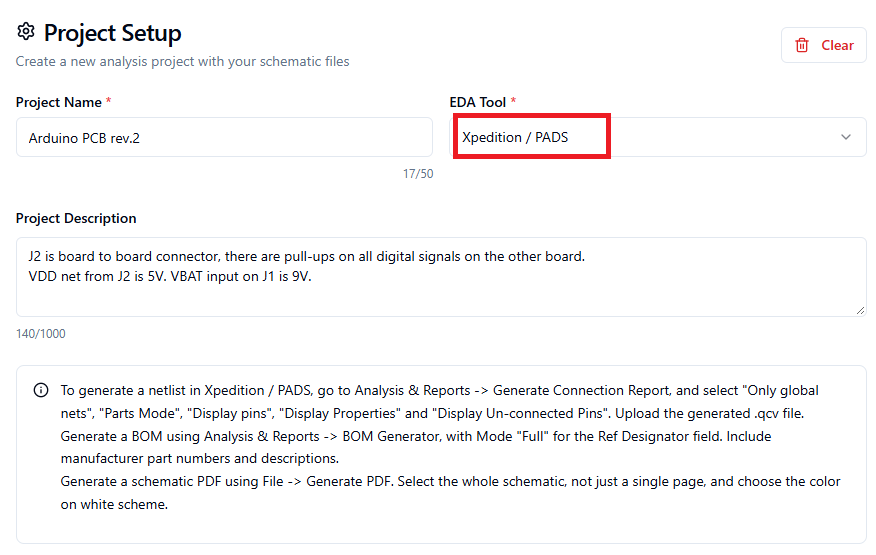
- Enter the project name and a short project description. It is useful to add to the description important things that describe your schematic and the context to help the AI engine in the analysis. For example, details on the input/output interface, voltages and currents, the application of the PCB, etc. A project description is optional, but can improve the results.
- Select the EDA software that was used to create the schematic – in this case, Xpedition / PADS.
Step 3: Export Netlist (Connection Report)
Open your schematic in Xpedition and:
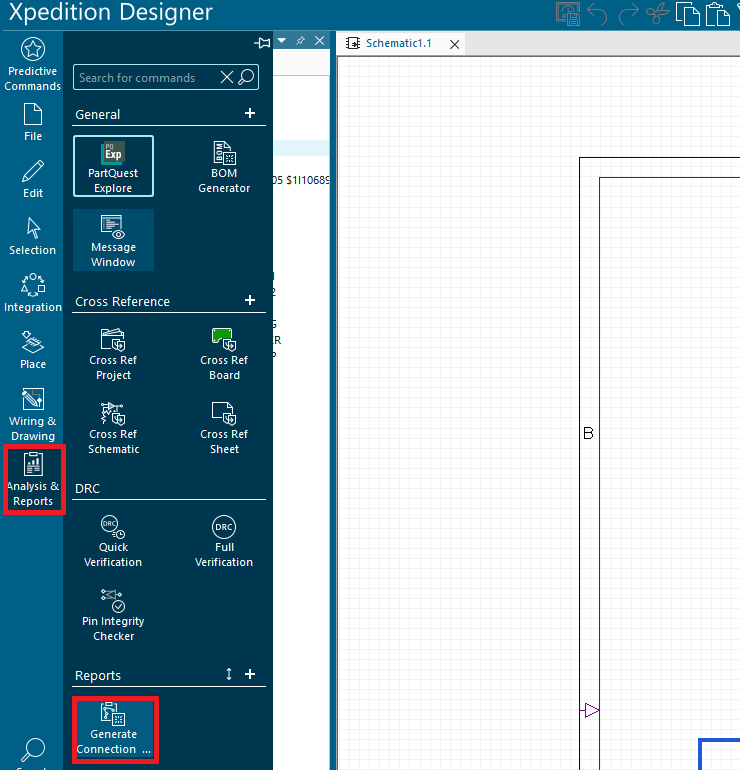
- Go to Analysis & Report → Generate Connection Report
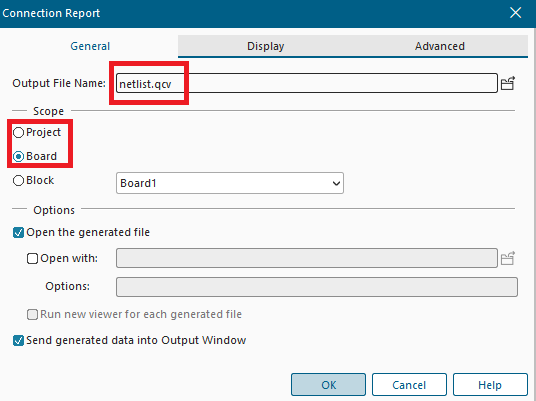
- In the “General” tab, give a name to the netlist file. Keep the qcv extension.
- Select the scope for the analysis, usually the board. Make sure not to select a block that contains only part of the design being analyzed.
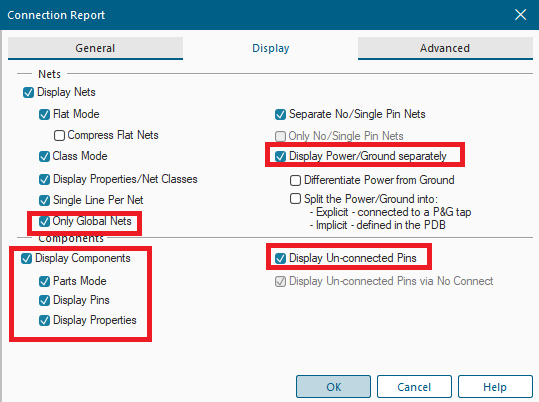
- In the “Display” tab, check everything under “Display Components”, including “Display Un-connected Pins”. Select “Only Global Nets” and “Display Power/Ground separately” under “Display Nets”.
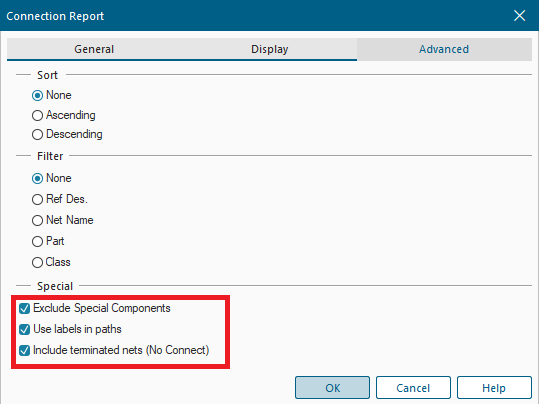
- In the “Advanced” tab, check everything under “Special”.
Step 4: Export BOM in .xlsx Format
Make sure to export a BOM that contains manufacturer part numbers and manufacturer names. Do not include non-populated components in the BOM:
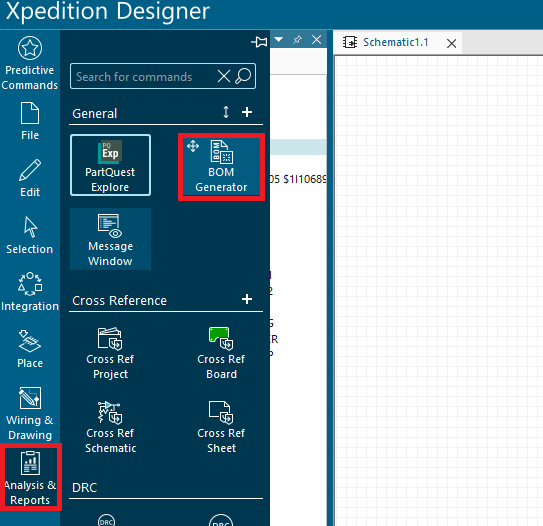
- Go to Analysis & Report → BOM Generator
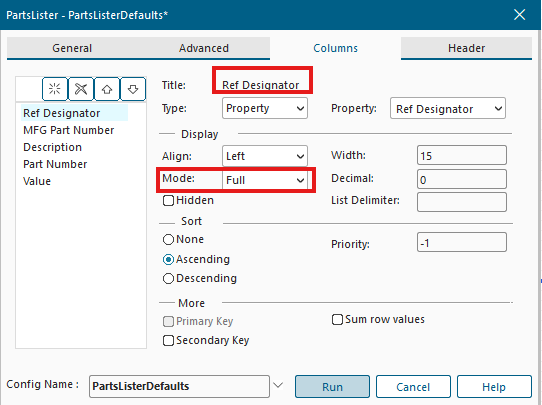
- Select at least the following parameters to be in the BOM: Ref Designator, MFG Part Number, Description.
- Ensure that the Ref Designator is with Display Mode = “Full”.
Step 5: Export Schematics PDF
- Go to File → Generate PDF.
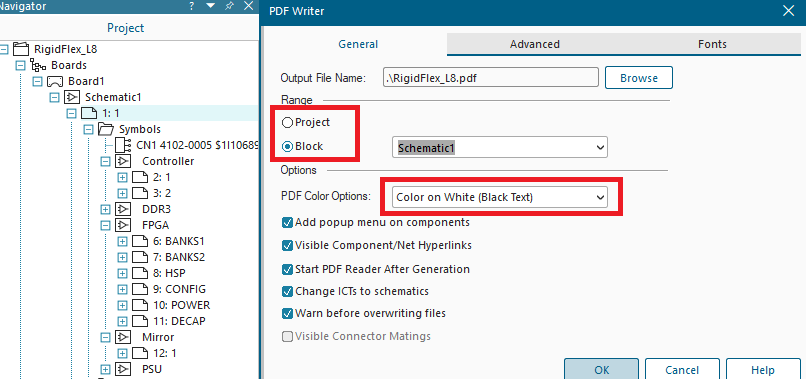
- To generate a single PDF containing all pages, Make sure to choose option “Current Project” as export target, and not “Current Document”.
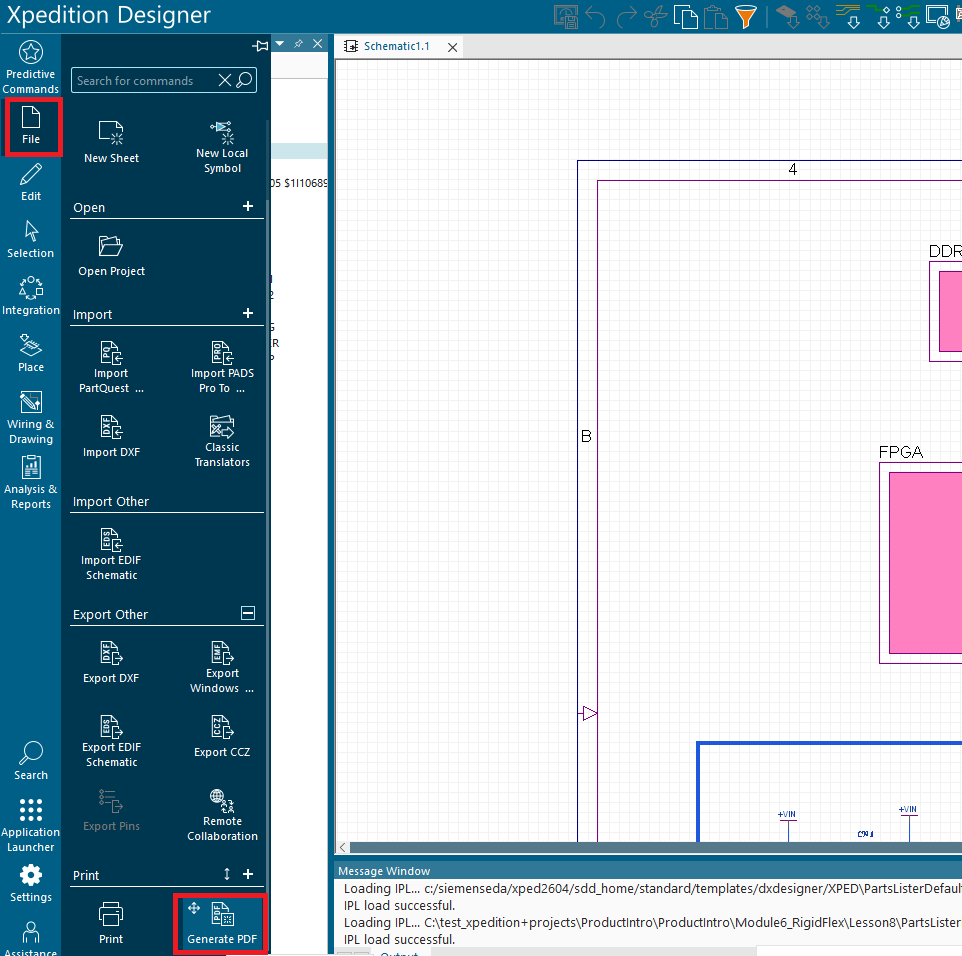
- Select the “Range” to include all schematic pages in your board.
- Choose a PDF color scheme that provide a good quality for the AI vision model. Usually “Color on White” is a good choice.
Step 4: Upload the Files
- Drag and drop or browse and upload the Netlist, the BOM and PDF files you created in the previous steps.
- Start the analysis. You will receive an email notification once the process is complete. The analysis typically takes between 5 to 30 minutes.

Step 5: Results and Recommendations
- Once the analysis is complete, a full report will be generated, including all findings as well as a short AI-generated summary. Typical results include: connectivity issues, logical pitfalls, component insights, best-practice suggestions, reliability and other design issues.
- You can download the report in PDF format.
In addition, every analysis is automatically saved to your personal Dashboard for future access.
You’re now ready to let AI help you design smarter, faster, and with fewer mistakes!